 linuxgeek Tech Notes
Full Disk Encryption in Debian 12 Bookworm, Including Boot with LVM
No-nonsense step-by-step guide to Debian 12 Bookworm full disk encryption with LVM.
- What You Get In The End
- Prerequisites
- Base System Installation
- Partition Disks
- Bootloader Installation
- Chroot into the Installed System
- GRUB Installation
- Convert LUKS Key
- Finish Installation
- Add Keyfile
- Initramfs
What You Get In The End
- A fully encrypted drive (including
/boot, except for the UEFI partition) with LVM set up. - You will only need to enter your password once during boot to unlock your encrypted drive.
Prerequisites
- A UEFI-ready system.
- Bootable Debian 12 Bookworm net installation media.
- An empty drive for installation.
Base System Installation
- Boot from the Debian net installation image.
- Select ‘Expert install’ under the ‘Advanced’ menu item.
I won’t describe all the installation steps since everything is quite self-explanatory. Proceed to the disk partition phase.
Partition Disks
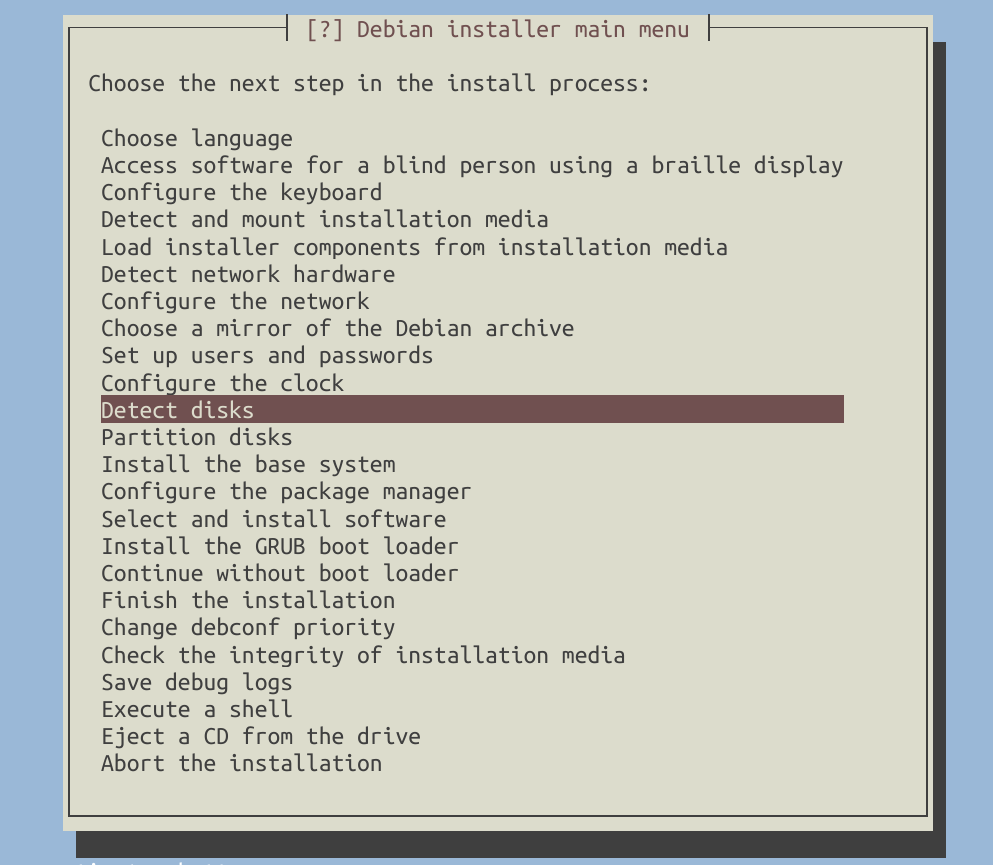
Detect disks:
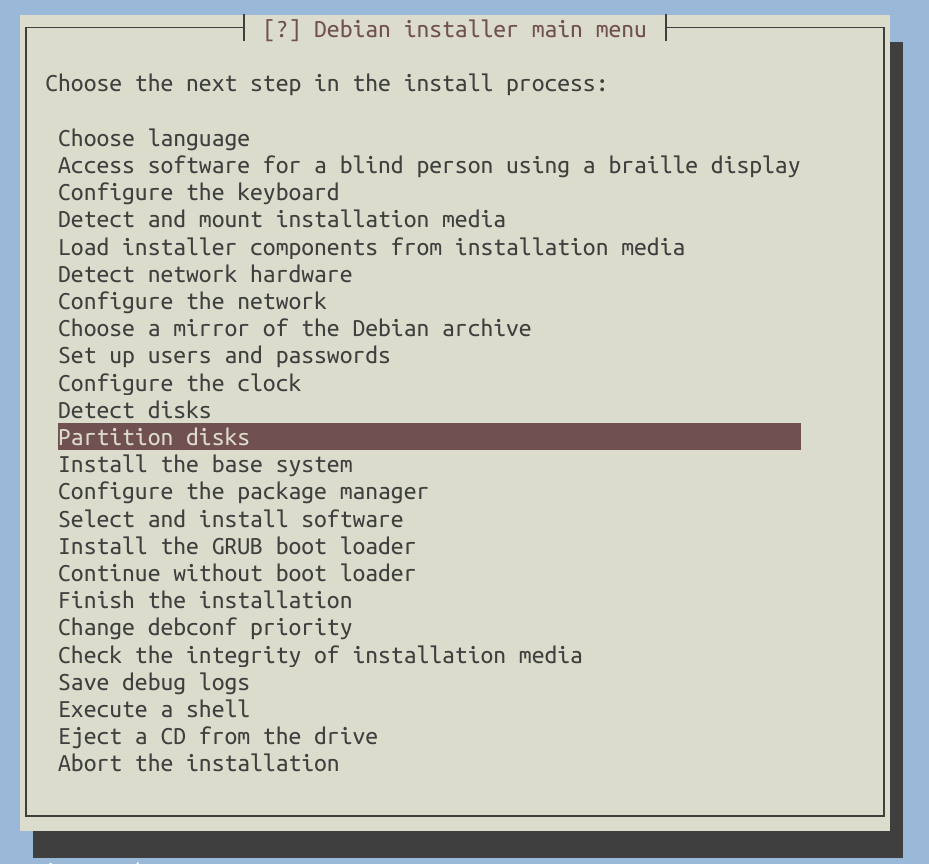
Open partition disks menu:
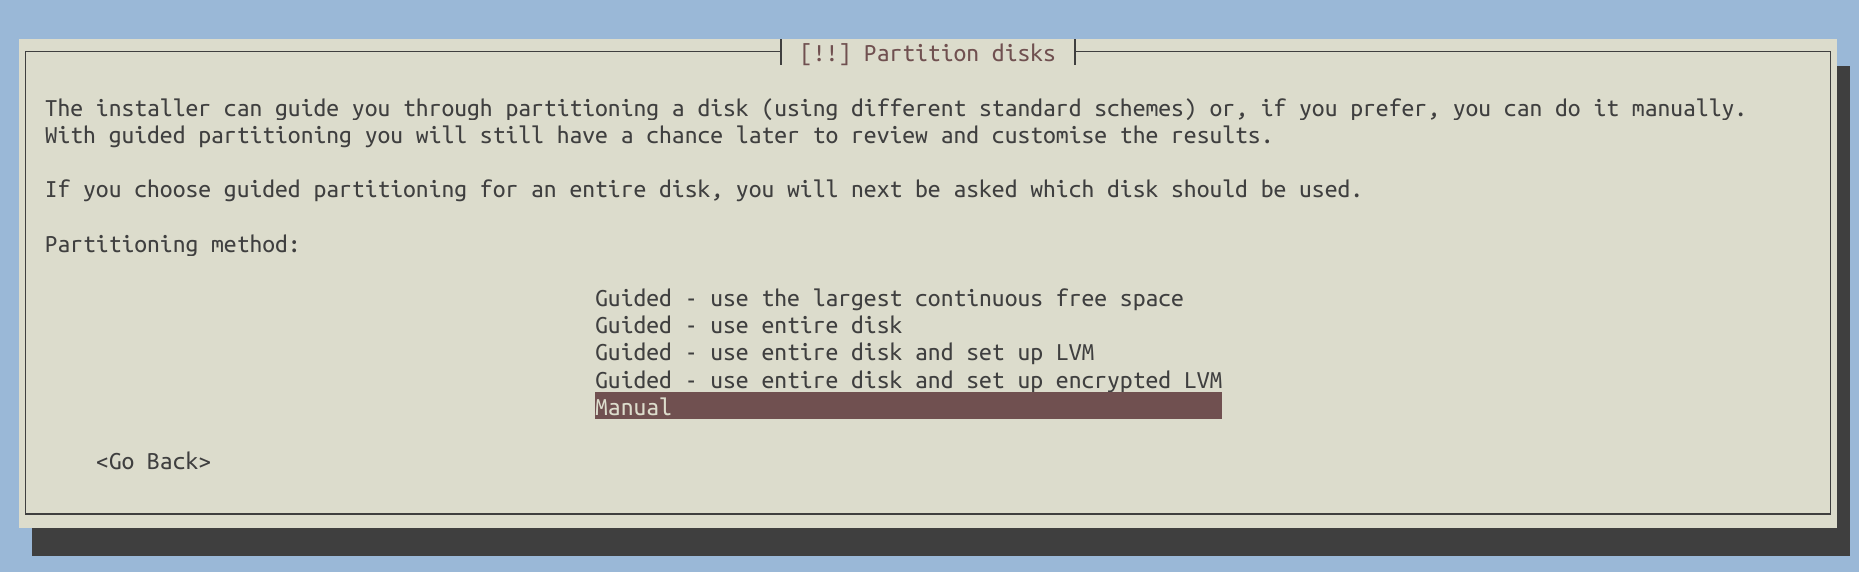
Select ‘Manual’:
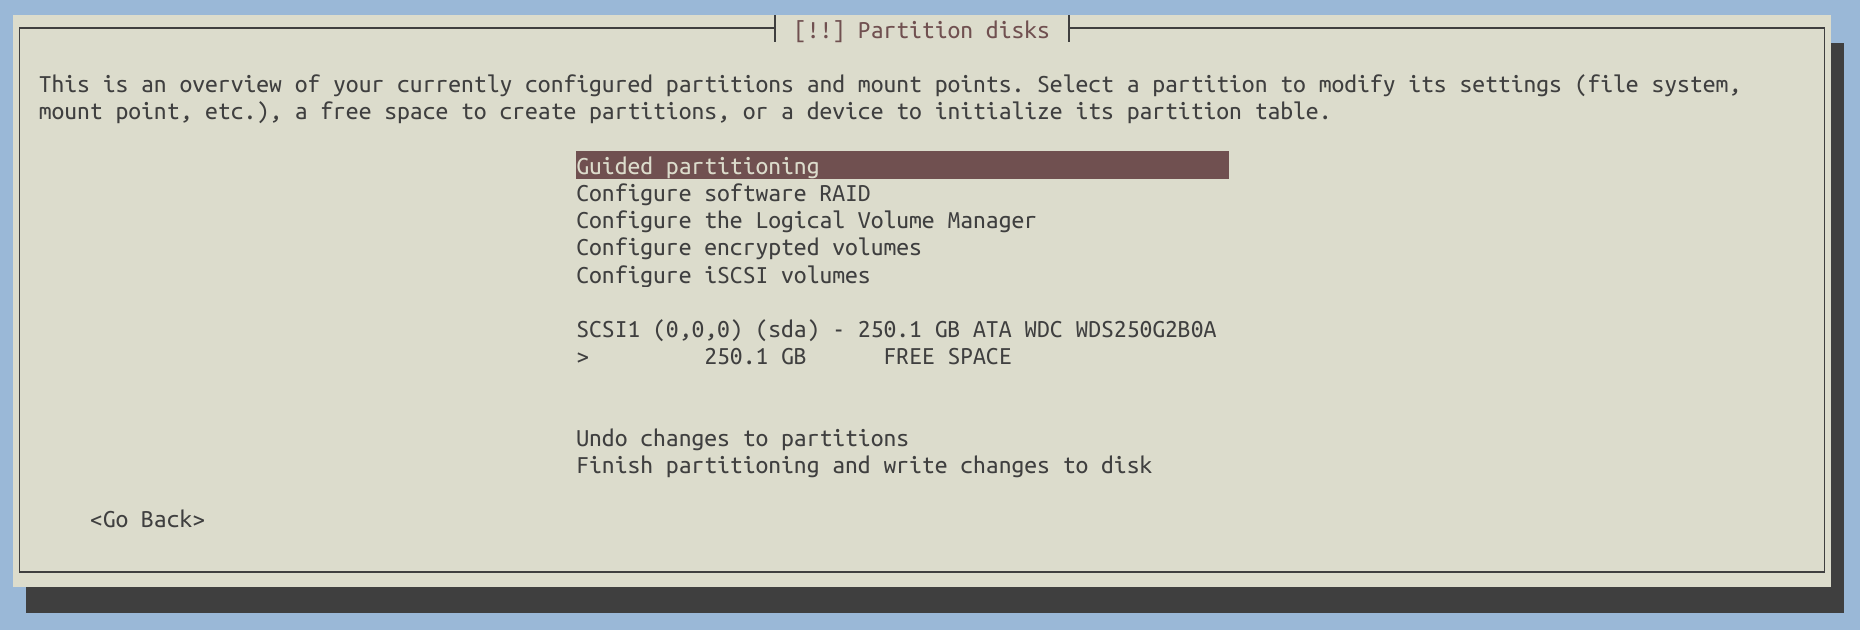
Let’s suppose the disk we will use for installation is /dev/sda. If you are using a different disk, please replace /dev/sda with your actual drive.
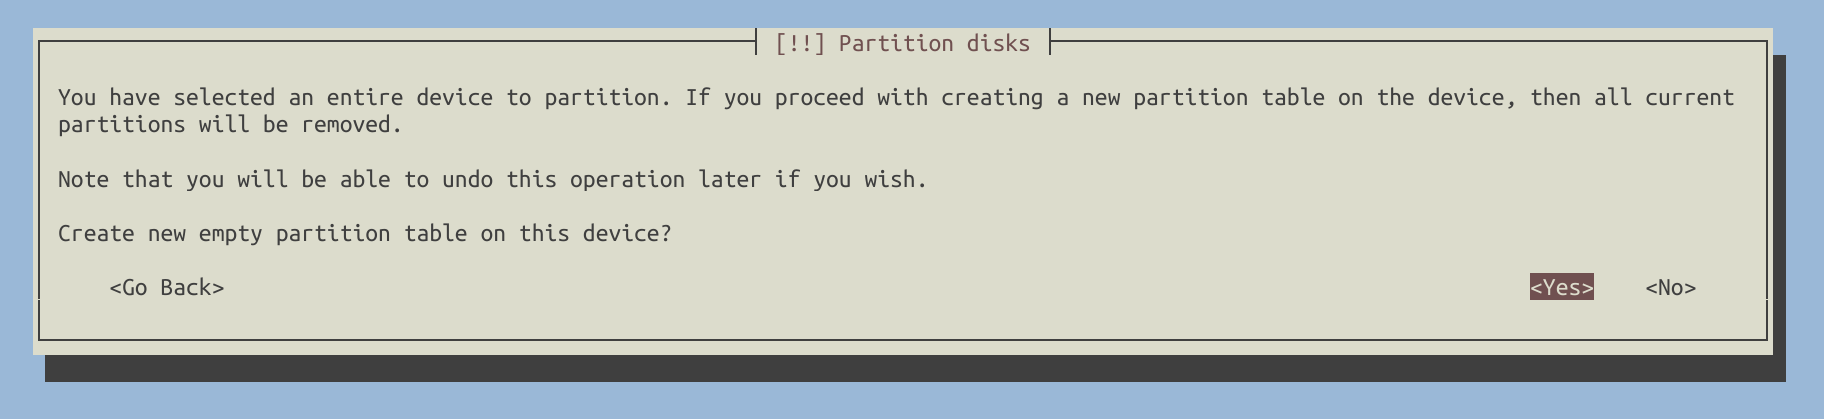
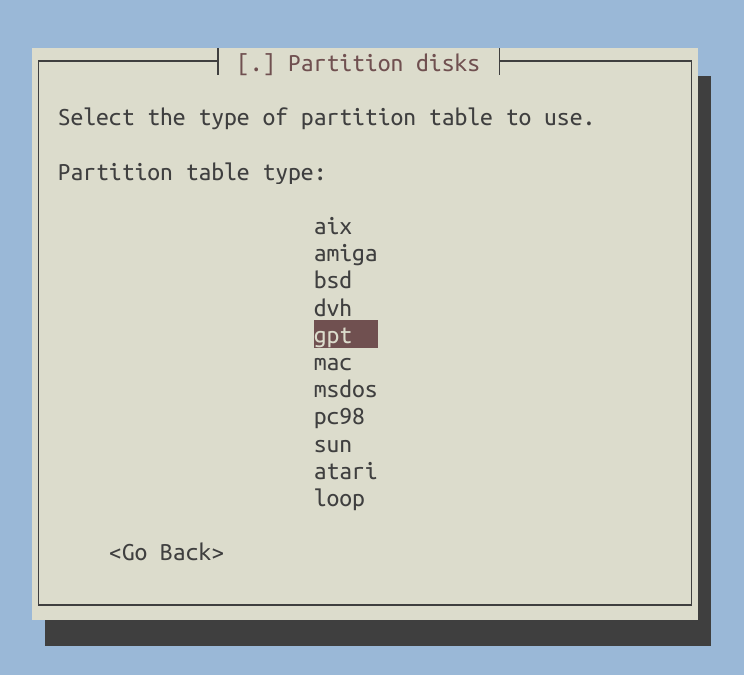
Select /dev/sda and create a new GPT partition table on it.
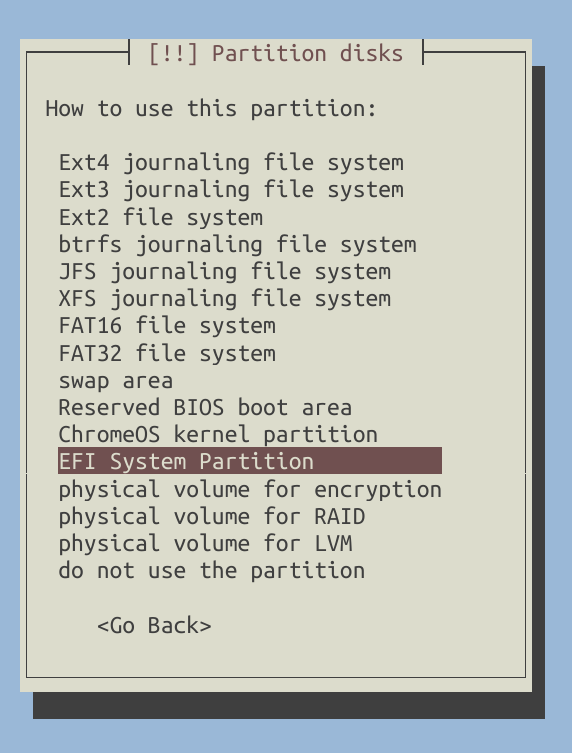
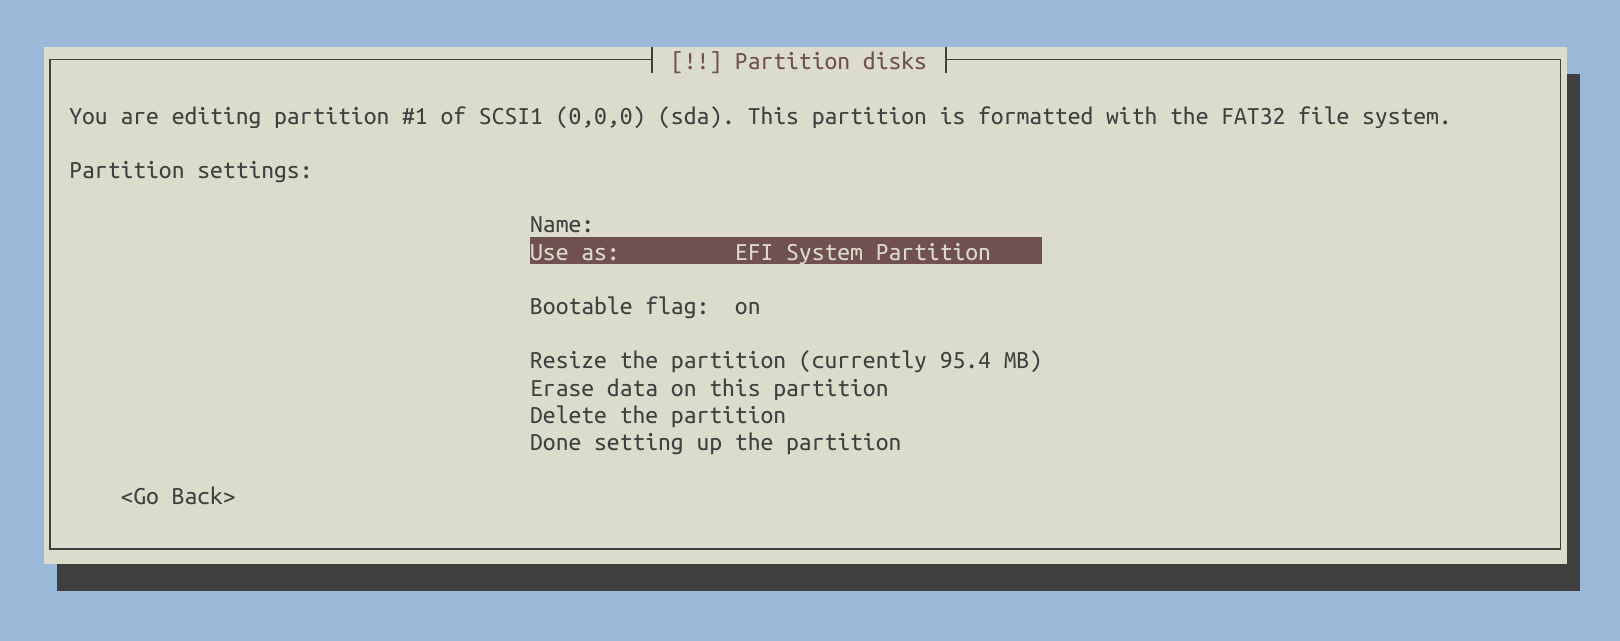
Next, create a small EFI partition at the beginning of the drive, with a size of up to 500MB to support UEFI boot.
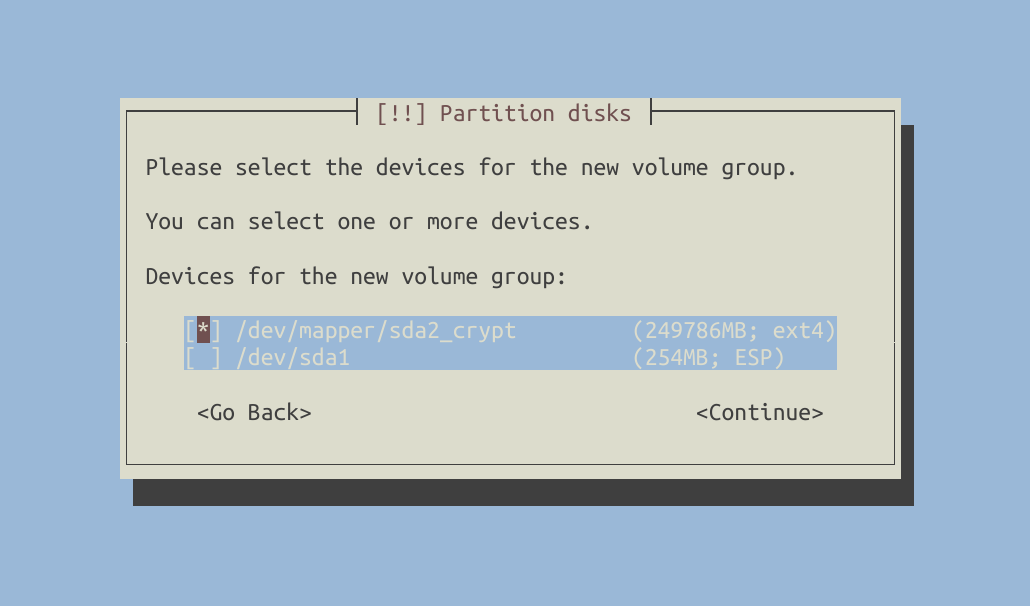
Now, let’s create an encrypted volume using all the remaining free space. This includes encrypting /boot, which will also reside on LVM.
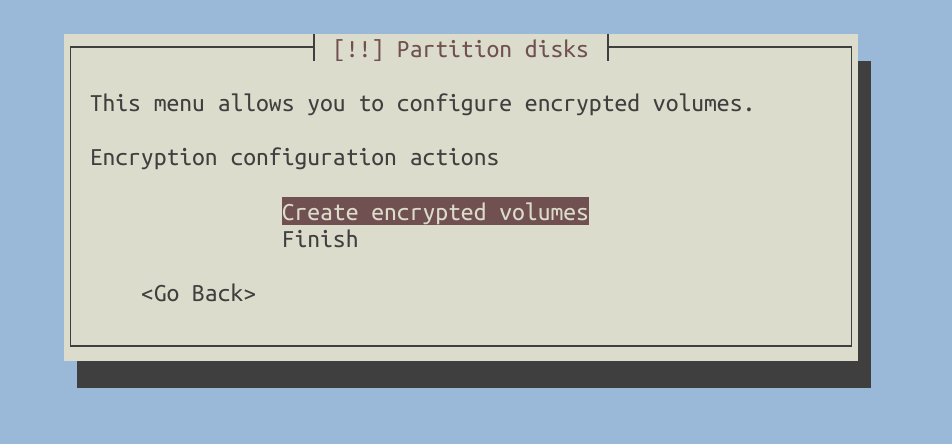
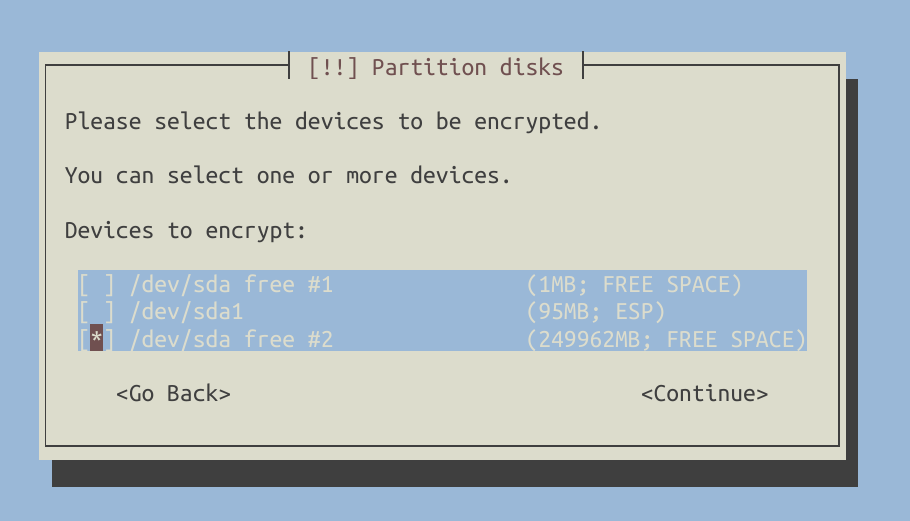
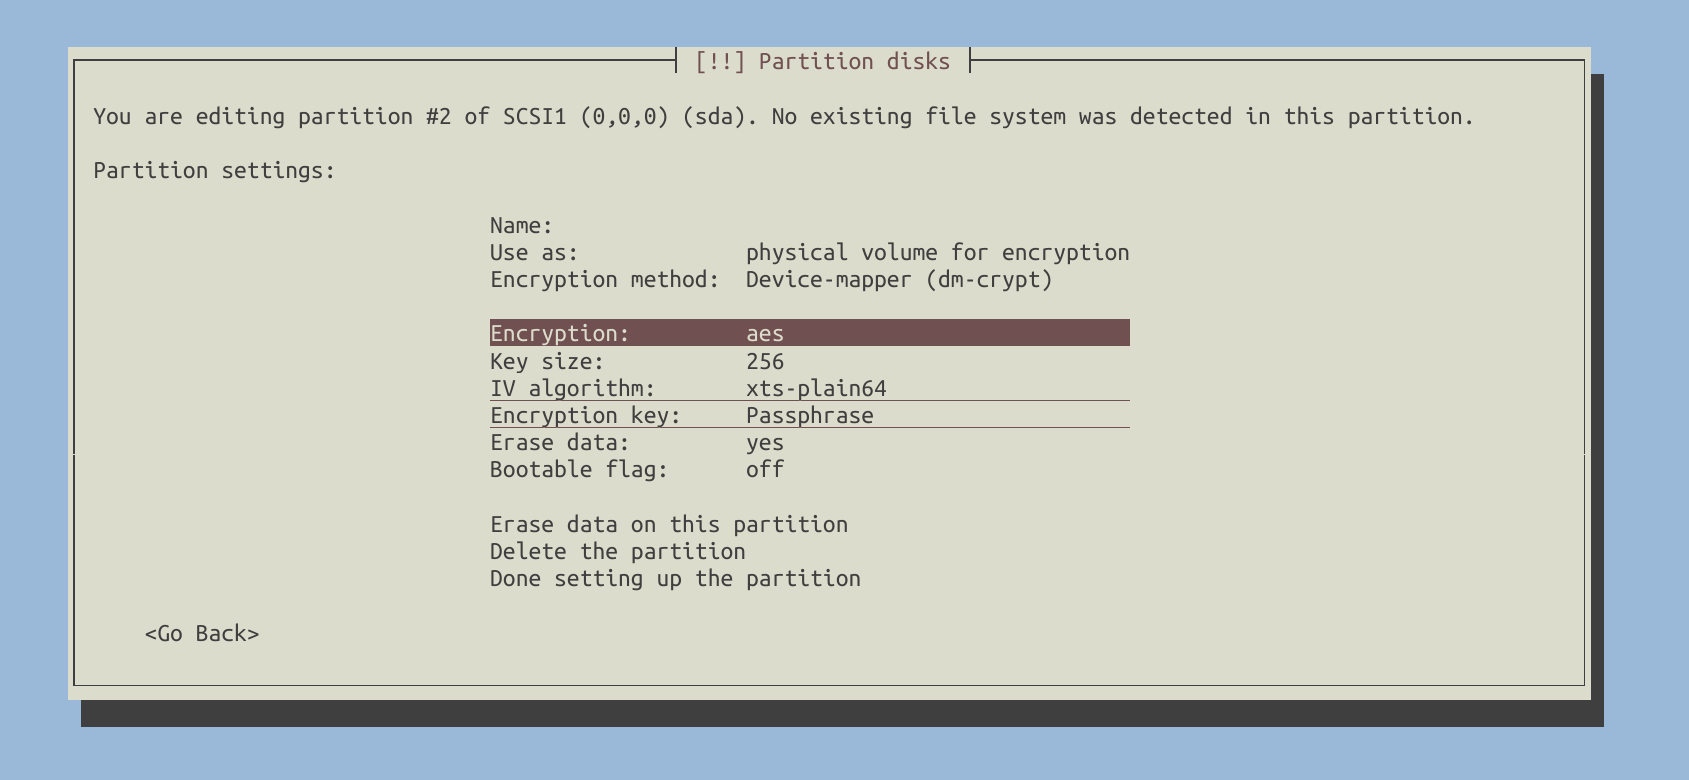
Apply the changes and wait for a moment while the installer erases the drive before proceeding with encryption. You will be prompted to enter a passphrase during this process.
Time to configure LVM.
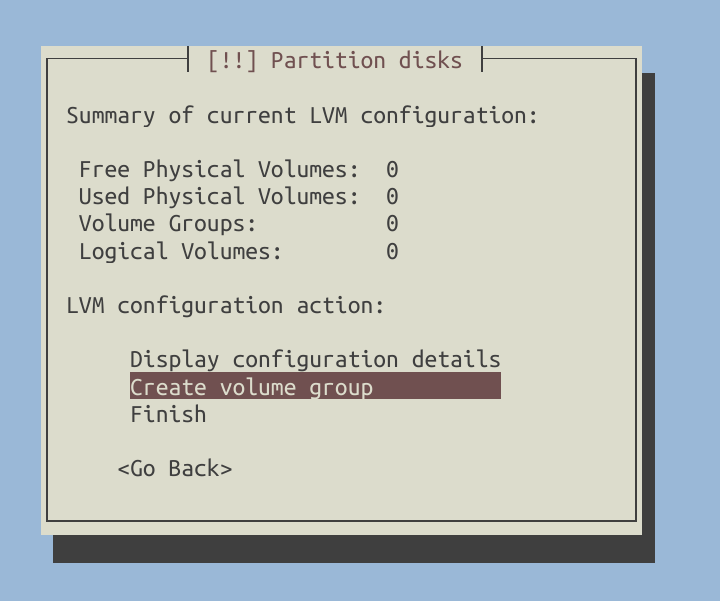
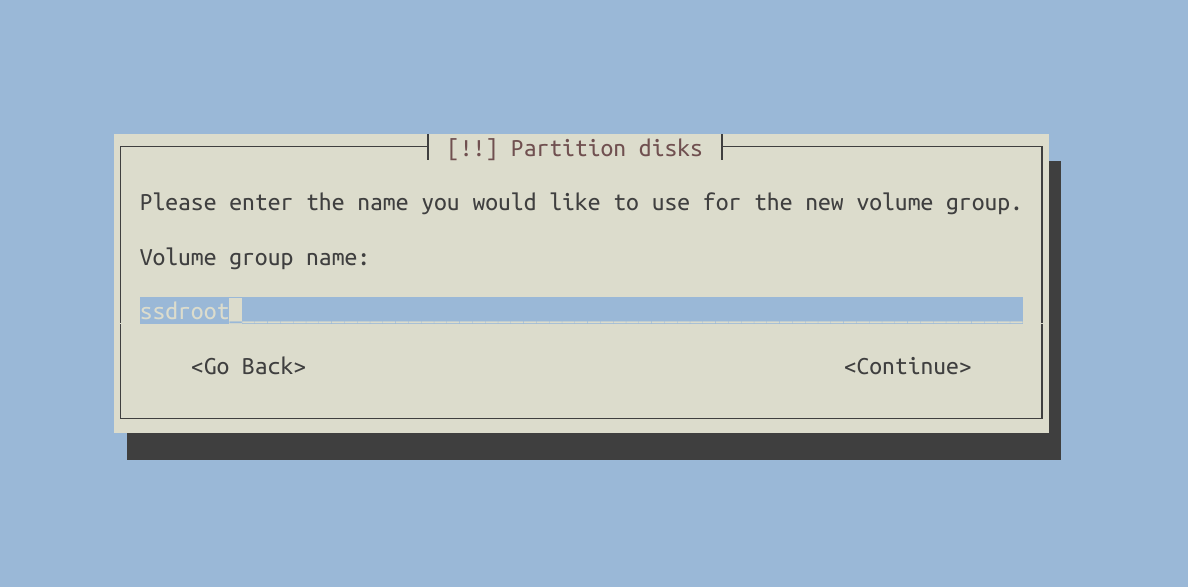
Create logical volumes.
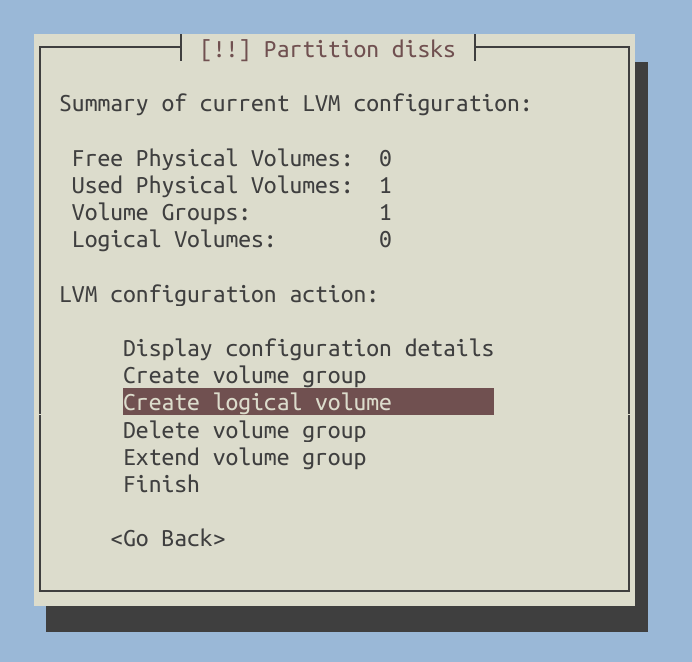
You can customize the configuration to suit your specific needs. For my setup, I created the following logical volumes:
/boot: Formatted with the ext2 filesystem./root: Formatted with the ext4 filesystem./home: Formatted with the ext4 filesystem./tmp: Formatted with the ext2 filesystem.- I didn’t create a swap partition. If you require one, you can create another logical volume for it.
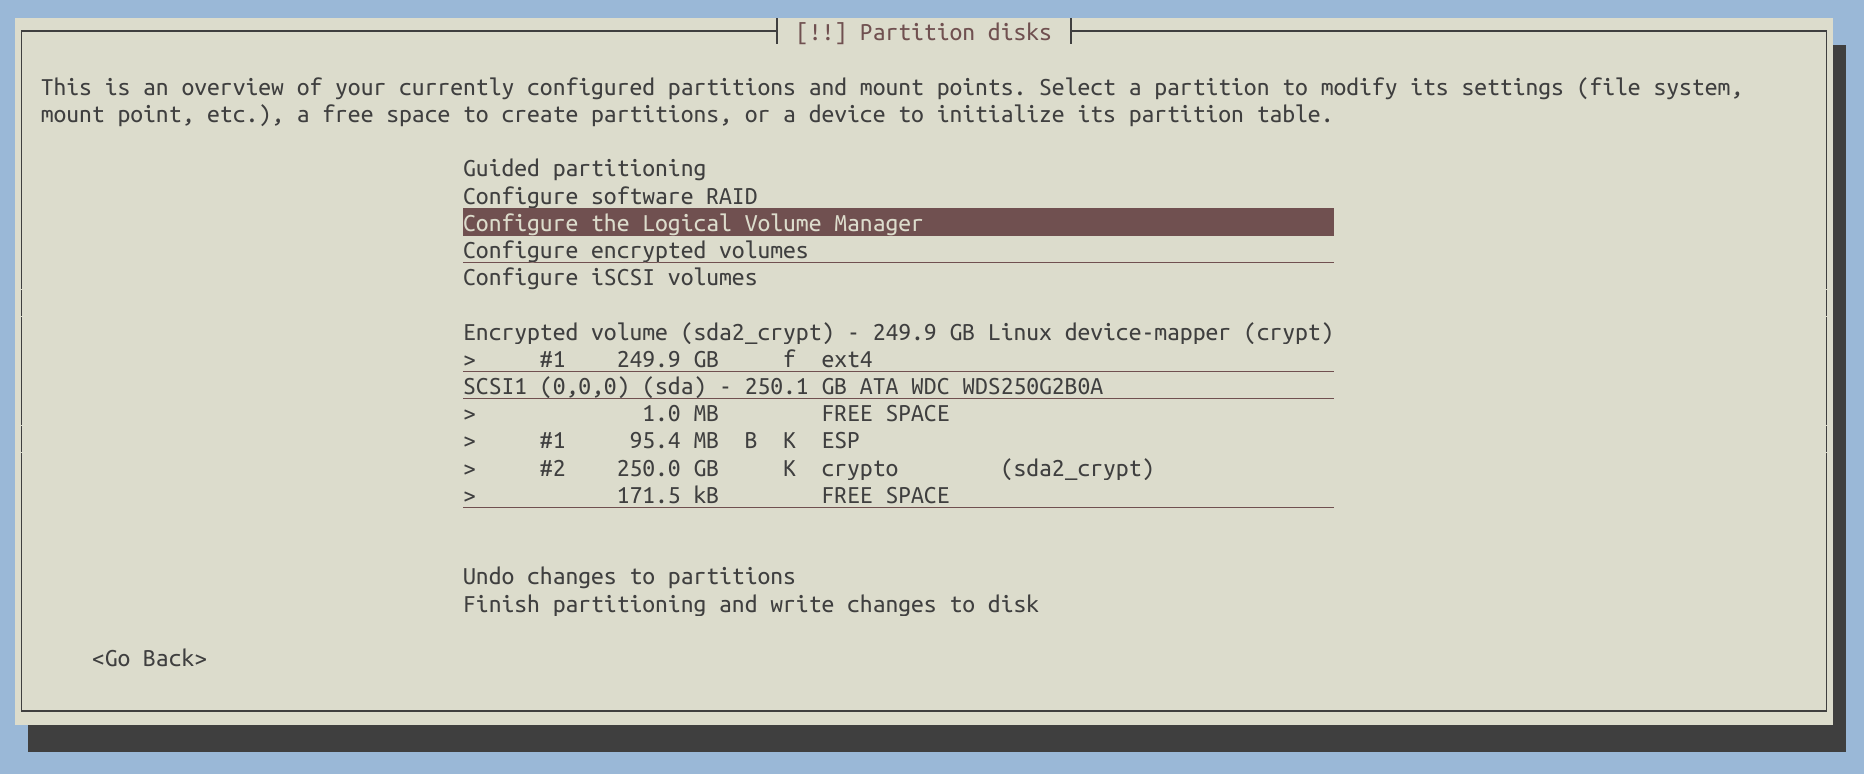
As a result, my disk configuration looks like this:

If everything appears to be in order, write the changes to the disk.
Proceed to install the base system, configure APT, and install the required packages.
Bootloader Installation
Do not install GRUB from the installation menu. You will encounter an error in any case:

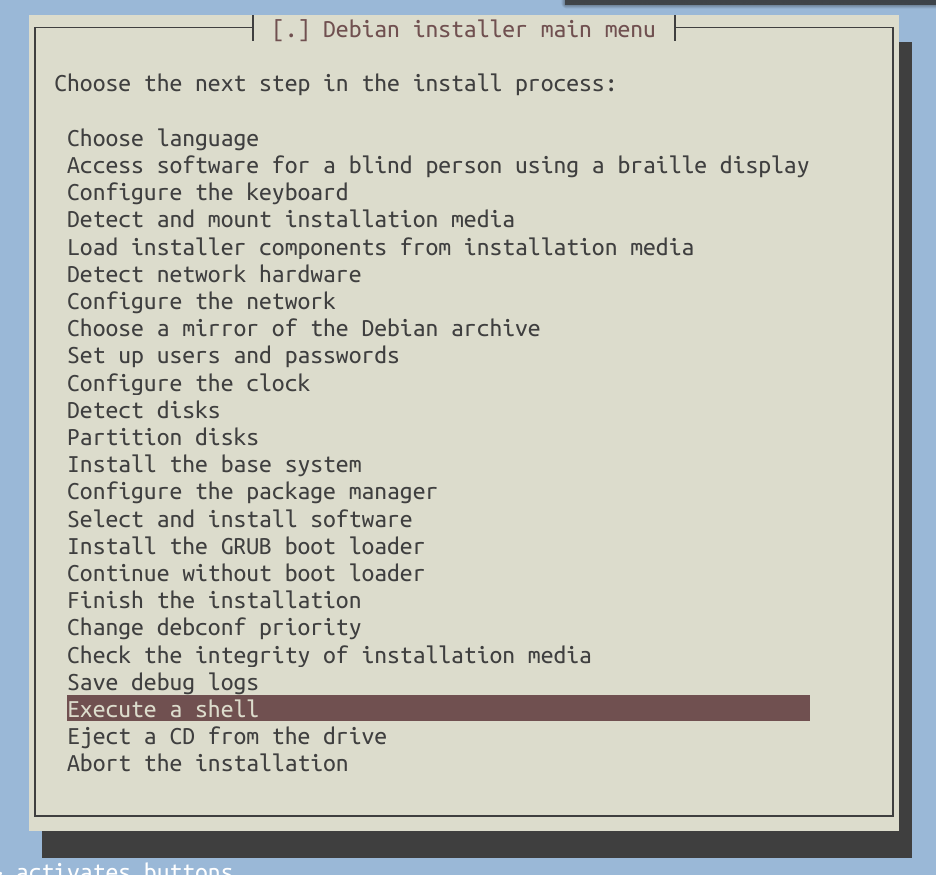
Also, please note that installing GRUB may potentially lead to UEFI boot errors. To avoid this, simply skip the GRUB installation step and select ‘Execute a shell’ from the installer menu:
Chroot into the Installed System
The new system root is located under /target. To continue, we need to chroot into it:
cd /target
mount --bind /dev dev/
mount --bind /sys sys/
mount --bind /proc proc/
mount --bind /dev/pts dev/pts
mount --bind /cdrom media/cdrom
chroot . bin/bash
Mount EFI partition /dev/sda1:
mount /dev/sda1 /boot/efi
GRUB Installation
Install GRUB first (recall that we skipped this step previously):
apt install grub-efi
Retrieve the UUID of the encrypted drive (/dev/sda2 in my case):
blkid -o value -s UUID /dev/sda2
Let’s assume the UUID of our crypto disk is as follows (I will use this UUID in the instructions below):
75f02227-8804-40d6-ad0b-7c0bc9125c49
Open GRUB configuration:
nano /etc/default/grub
And add the following:
GRUB_CMDLINE_LINUX="cryptdevice=UUID=75f02227-8804-40d6-ad0b-7c0bc9125c49:lvm"
GRUB_ENABLE_CRYPTODISK=y
Generate GRUB config:
grub-mkconfig -o /boot/grub/grub.cfg
Install GRUB:
grub-install --target=x86_64-efi --boot-directory=/boot --efi-directory=/boot/efi --removable
If the installation was successful, the output should be as follows:
Installing for x86_64-efi platform.
Installation finished. No error reported.
Convert LUKS Key
I’m not entirely certain if this step is necessary, but I encountered some boot issues when omitting it.
cryptsetup luksConvertKey --pbkdf pbkdf2 /dev/sda2
Some people have suggested that LUKS v2 is not supported by the current version of GRUB and that it needs to be downgraded to LUKS v1 (see references in the end of the article). However, in my experience, this is not the case. I successfully booted the system from a LUKS v2 encrypted drive with no issues.
Finish Installation
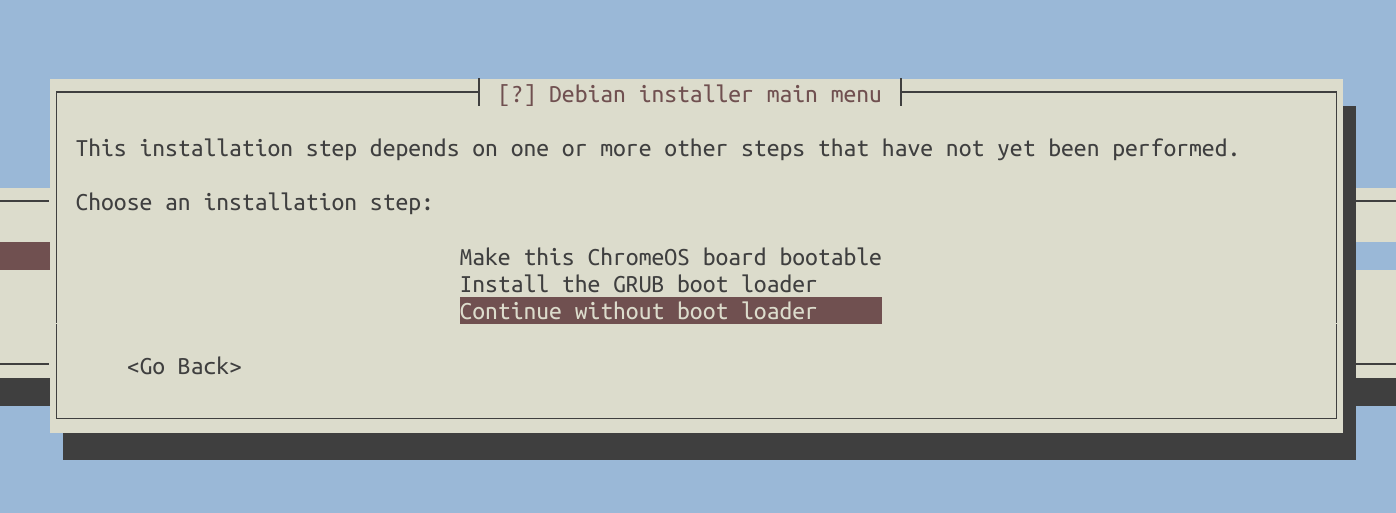
During the installation, the installer will prompt you about the bootloader. Select ‘Continue without bootloader’ and confirm this choice since you’ve already installed it.
Then reboot and load your freshly installed operating system. During the first boot, you will need to enter your password twice.
Add Keyfile
To avoid entering your password twice, you can add a keyfile to a new LUKS key slot and instruct the system to use it for unlocking the encrypted disk during boot.
Generate a keyfile from random data:
sudo dd bs=512 count=8 if=/dev/urandom of=/keyfile iflag=fullblock
Add key to our crypto disk:
sudo cryptsetup luksAddKey /dev/sda2 /keyfile
Change permissions (even root doesn’t need any permissions to access keyfile):
sudo chmod 000 /keyfile
sudo chmod -R g-rwx,o-rwx /boot
Additionally, you have the option to make /boot mounted as read-only at a later stage.
Now modify /etc/crypttab and replace none with the keyfile path (/keyfile) and specify the key slot it occupies (key-slot=1):
sda2_crypt UUID=75f02227-8804-40d6-ad0b-7c0bc9125c49 /keyfile luks,discard,key-slot=1
Initramfs
Modify /etc/cryptsetup-initramfs/conf-hook:
sudo nano /etc/cryptsetup-initramfs/conf-hook
With:
KEYFILE_PATTERN="/keyfile"
In /etc/initramfs-tools/initramfs.conf, set UMASK to restrict access to root-only, preventing the key from being leaked:
echo UMASK=0077 | sudo tee --append /etc/initramfs-tools/initramfs.conf
Generate new initramfs image:
sudo update-initramfs -u -k all
Verify that the image has the restrictive permissions:
stat -L -c "%A %n" /initrd.img
Output should be:
-rw------- /initrd.img
And includes the key:
sudo lsinitramfs /initrd.img | grep "^cryptroot/keyfiles/"
Output should be:
cryptroot/keyfiles/sda2_crypt.key
That’s it. After rebooting, you will only need to enter your password once.
References:
- Full disk encryption with LUKS (including /boot)
- Full disk encryption (including boot) on Debian Bookworm
- Full disk encryption, including /boot: Unlocking LUKS devices from GRUB
- GRUB Bootloader with root LUKS encryption: only grub shell
- grub-probe: error: failed to get canonical path of /cow